How to Install RTA Kitchen Cabinets: A Complete Guide
Installing ready-to-assemble (RTA) cabinets is a straightforward process with the proper preparation and cabinet installation tools. RTA cabinets are an excellent choice for those looking to save on kitchen renovations without sacrificing quality or style. So, how do you properly install cabinets?
Tools Needed for Installation:
- Tape Measure and Pencil - These precision tools are indispensable for achieving accurate measurements, a crucial step to ensure cabinets fit perfectly. Use the tape measure to obtain exact dimensions, then mark the measurements and positions on walls and cabinets with a pencil. The advantage of using a pencil is the ability to erase marks easily, allowing you to make adjustments without damaging surfaces.
- Clamps - Clamps are your stability champions. They are essential for holding pieces of the cabinet together while you fasten them. By keeping the cabinets and their parts aligned and stable, clamps facilitate a secure and accurate installation process.
- Ledger Board - Consider the ledger board your installation safety net. It serves as a temporary support for upper cabinets, holding their weight while you attach them to the wall. With the ledger board in place, you can confidently install upper cabinets, knowing they are securely supported.
- Stud Finder - This tool is crucial for locating studs behind the drywall. Attaching cabinets to the studs provides the necessary stability and support, preventing them from pulling away from the wall over time.
- Level - A level is vital to ensure your Ready-To-Assemble (RTA) cabinets are perfectly horizontal or vertical. Proper alignment is key to their functionality and appearance.
- Shim - Shims are thin materials used to fill gaps and adjust cabinet heights. They are particularly useful for achieving even cabinets on uneven floors or when walls and floors are not straight.
- Drill and Drill Bits - A drill and the appropriate drill bits are essential for making holes and driving screws, significantly speeding up the installation process.
- Nail Gun - For attaching any trim like scribe, shoe, toe-kick or crown molding.
- Hardware Jig - For perfect alignment when installing pulls & knobs.
- Caulk Gun (Color Match with Cabinet Color) - For any gaps & filling nail holes.
These step-by-step instructions will walk you through how to install kitchen cabinets for beginners. This makes installation simple, from start to finish, helping you completely transform your kitchen.
How to Install Cabinets:
Let's examine each step so you are 100% equipped with the knowledge needed to install cabinets. After you review this list, you will discover how to install wall cabinets, base cabinets, and drawers.
1. Take Kitchen Measurements


Start by carefully measuring the kitchen area. Use a pencil and tape measure to note measurements throughout the room. Measure from top to bottom. Be sure to mention any obstructions from windows to doorways and electrical outlets. Additionally, use a stud finder to mark where any studs are present to attach the cabinetry to offer more support.
2. Protect Installation Area


Be meticulous in the process of protecting the floors and surfaces from scratches or any damage during installation. Begin by laying out a tarp or plastic sheet, then meticulously remove any dust and debris from these surfaces.
3. Utilize a Ledger Board for Easier Installation


Use a ledger board, a horizontal piece of wood attached to the wall where you will put the kitchen cabinets. This tool allows for easier installation and control and offers temporary support to hold them in place while you install the cabinetry. However, it's important to note that when using the ledger board, always ensure it's securely fastened to the wall to avoid accidents or injuries. You can also utilize a shim for proper leveling throughout the process.
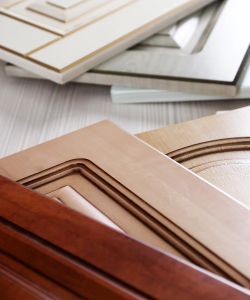
4. Check Cabinets


Upon the arrival of your cabinetry, take a moment to inspect the materials. This step will reassure you of the quality and completeness of your order. Our team is here to help you if you have specific questions about the process.
Pro Tip: Organize Hardware - Quickly organize hardware into different Ziploc bags or Tupperware to keep it organized during cabinet installation.
5. Install Wall Cabinets


Begin by marking a horizontal line on the wall where the bottom of the wall cabinets will sit, typically 54 inches from the floor, to account for a standard 18-inch backsplash and 36-inch base cabinet height. Find and note wall studs using a stud finder, then temporarily screw a ledger board along the marked line to support the cabinets during installation. Starting with the corner wall cabinet, position it and attach it to the studs with screws, ensuring it is level and plumb before moving on to the next cabinet. Connect each subsequent cabinet to its neighbor, checking for level alignment and adjusting as needed.
Pro Tip: Label Everything - If you plan to take a break during the cabinet installation, label the parts and hardware and where they go. This will allow you to jump back into the project seamlessly.
6. Install Base Cabinets


For base cabinets, start again in a corner, shimming as necessary to ensure they are level and even. Secure them to the wall studs with screws through the back panel. Join adjacent base cabinets using clamps to hold them together while you drill and screw them through the side panels. Finally, remove any temporary supports and add finishing touches, such as trim and hardware, to complete the installation.
7. Add Doors and Finishing Touches
You can add the finishing touches once the cabinets have been installed. Attach the doors and finish the nails with a hammer. Now, you can step back and enjoy your new kitchen cabinets!
Pro Tip: Attach hardware to cabinet doors and drawers last.
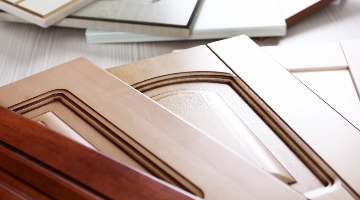
Why Choose Wholesale Cabinets Warehouse?
Wholesale Cabinets Warehouse is your ultimate destination for sourcing high-quality RTA (Ready-to-Assemble) kitchen cabinets. Our cabinets are designed for easy assembly, allowing you to kickstart your kitchen renovation yourself without the need for professional installation.
We understand that time is of the essence in any renovation project. That's why we deliver your premium cabinets within 2-4 business days, ensuring you can start your project without unnecessary delays. By removing the middlemen, Wholesale Cabinets Warehouse passes significant savings directly to you, offering top-quality cabinets at a fraction of the cost. This makes your investment both secure and value-driven.
With Wholesale Cabinets Warehouse, you're not just buying cabinets; you're investing in quality and efficiency. Start your kitchen transformation today and experience the difference our RTA cabinets can make!
Frequently Asked Questions
Is it possible to install RTA cabinets myself?
Yes, you can install the cabinets yourself if you have the necessary tools, skills, and patience. Cabinet installation requires precise measuring, leveling, and securing to ensure they are sturdy and functional. If you're comfortable with DIY projects and have some experience with home improvement tasks, you're good to go.
Is it easy to install ready to assemble cabinets?
Cabinet installation involves taking precise measurements, ensuring the cabinets are level, and securely attaching them to the walls. Common challenges include:
- Handling heavy cabinets.
- Properly aligning doors and drawers.
- Working around existing plumbing and electrical fixtures.
While a determined DIYer can manage the process, it requires time and attention to detail.
Where do I begin when installing my own kitchen cabinets?
Before you begin installing cabinets, proper preparation is essential. Clear the kitchen area, mark measurements on the walls, and use a stud finder to locate any studs. Once you've gathered your cabinet installation tools, you can officially start the process!
What is the average cost of kitchen cabinet installation?
The cost of kitchen cabinet installation is influenced by several factors, including the size of the kitchen, the type of cabinets chosen, and your location. Typically, a kitchen installation ranges from $3,000 to $8,000. Custom cabinets can significantly increase the cost, ranging from $12,000 to $25,000 or more. Additionally, these estimates do NOT include labor costs.
Why are cabinet installations so expensive?
Cabinet installation costs add up quickly due to the need for professional labor, materials, and any custom requests from the homeowner. However, by installing the cabinets yourself, you can significantly reduce these expenses.
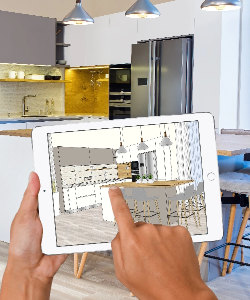

Free kitchen Design
Visualize your dream kitchen in 3D – schedule a free design consultation with our expert designers today!