Comprehensive Guide - How to Assemble RTA Cabinets

Starting the build of ready-to-assemble (RTA) cabinets is an exciting step towards transforming your space. Whether you're a DIY expert or a first-time renovator, the key to success is preparation. This guide will provide you with essential tips to streamline the assembly process and ensure stunning results. Let's dive in and discover how to assemble RTA cabinets like a professional.
Tips on How to Assemble RTA Cabinets
Prep for Arrival
Preparation is key even before your new cabinets arrive. Prioritize setting up a designated area where you'll assemble them, ideally a spacious room to avoid any accidental damage. Lay down a protective plastic tarp to safeguard your flooring and prevent any scratches on the cabinets. Additionally, anticipate the influx of cardboard that accompanies cabinet deliveries. Having a designated space to break down and store these boxes until disposal will help maintain a clutter-free environment throughout the assembly process.
Get Organized and Gather Supplies
Assembling RTA cabinets typically requires a few basic tools to ensure a smooth process. Here's a list of some you may need:
- Screwdriver: Both Phillips and flat-head screwdrivers may be needed, depending on the type of screws used in the assembly.
- Power Drill: While not always necessary, a power drill can significantly speed up the assembly process, especially for driving screws into hardwood or dense materials.
- Hammer: Useful for gently tapping parts into place or adjusting fitments.
- Level: Ensures that your cabinets are installed straight and aligned properly.
- Measuring Tape: Essential for accurately measuring spaces and ensuring precise placement of cabinets.
- Rubber Mallet: Helps to tap components together without damaging surfaces.
- Pencil or Marker: Used for marking drill holes or making notes on cabinet components.
- Safety Gear: Gloves to protect your hands and safety glasses to shield your eyes from any flying debris.
- Allen Wrench/Hex Key Set: Many RTA cabinets come with hardware that requires Allen wrenches for assembly.
- Assorted Clamps: These can help hold pieces together as you work, ensuring a secure fit during assembly.
- Step Stool or Ladder: Depending on the height of your cabinets, you may need a step stool or ladder to reach the upper areas safely.
Having these tools readily available before you start assembling your RTA cabinets will help streamline the process and ensure that everything is assembled correctly and securely.
RTA Cabinet Assembly Instructions
1. Lay Out All Materials
The first step is to lay out all the materials. Now that you have the cabinets and can see their scale, be sure you have enough room. Your active participation in this process is critical to its success, so follow the RTA cabinet assembly instructions closely. Exact instructions vary depending on the specific RTA cabinet style you choose.
2. Double Check Your List
Before starting cabinet assembly, cross-reference your list of cabinet pieces and tools. This meticulous check ensures everything is in order and ready for assembly. Contact the Wholesale Cabinets Warehouse customer service team for immediate assistance if needed.
3. Assemble Base Cabinet Boxes First
With all the preparations, it's time to start the RTA cabinet assembly. Start on base cabinets, then wall cabinets, attaching to the sequence for a smooth, efficient process.
4. Attach Side Panels, Shelves, and Back Panel
Next, attach the side panels, interior shelves, and back panels for each cabinet. Before proceeding to the next step, make sure that everything fits snug, is flush with the cabinet box, and is secure.
5. Attach Drawer Glides and Fronts
Once the cabinet boxes and shelves are assembled, start on the drawers. Secure the drawer glides to the interior of each drawer before attaching the drawer fronts. Before installing them, make sure everything is level and that the drawers open and close smoothly.
6. Repeat Steps for Wall Cabinets
After successfully putting the base cabinets together and securing the foundation, move on to the wall cabinets. Follow the steps above (1-5) for the wall cabinets as well.
7. Final Checks
Before declaring the project complete:
- Perform a final inspection of each cabinet.
- Securely attach doors and drawers and double check that everything is level and aligned.
- Clean up any dirt or packaging materials and admire your handiwork!
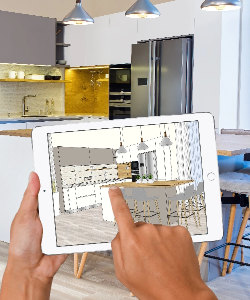
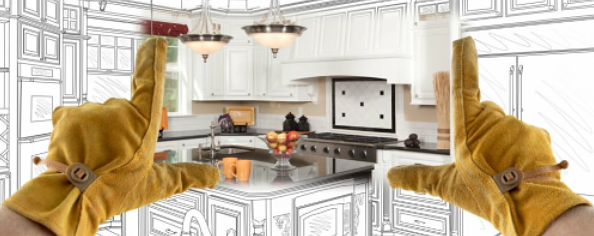
Free kitchen Design
Visualize your dream kitchen in 3D – schedule a free design consultation with our expert designers today!
Why Choose Wholesale Cabinets Warehouse?
Wholesale Cabinets Warehouse is your ultimate destination for superior RTA cabinet solutions. We understand the urgency of renovations, so we pride ourselves on lightning-fast shipping. Your luxury cabinets will ship within 2-4 business days, ensuring you can start your project promptly.
Every cabinet from Wholesale Cabinets Warehouse comes with a comprehensive 5-year warranty, providing you with peace of mind. Our RTA cabinets are built to last! Quality should always be affordable; by cutting out the middleman, we pass significant savings directly on to you!
Moreover, we provide refundable cabinet door samples, allowing you to experience the superior quality of our cabinets firsthand before committing. Take the opportunity to compare your top choices, empowering you to make a confident and informed decision when placing your order.
Do you need help figuring out where to start with your kitchen design? Our experienced designers will work alongside you to craft a concept that suits your lifestyle and personality. Start with a free kitchen design today and begin the RTA cabinet assembly process in no time!
Final Thoughts
Assembling RTA cabinets can be a manageable task. When you choose Wholesale Cabinets Warehouse, you can streamline the process and achieve professional-looking results. Take advantage of our free kitchen design service to kickstart your project and confidently transform your space. Experience the difference today and embark on your RTA cabinet assembly journey quickly!
Frequently Asked Questions
How hard is it to assemble RTA cabinets?
Assembling ready-to-assemble cabinets is quite simple actually. The holes are pre-drilled, making it quicker and easier to screw everything together. In addition, everything needed is included in the flat box shipped to your door, so you do not need to go to the store and ensure you have sourced everything you need.
How long does it take to assemble an RTA cabinet?
On average, assembling the first cabinet takes about 45 minutes. Once you get a hand in the process, you become more efficient. Therefore, each of the following cabinets takes roughly 20 minutes to assemble.
How much do you save with RTA cabinets?
When choosing RTA cabinets, you save approximately 30-50% compared to assembled or custom kitchen cabinets. These savings add up quickly, making it an excellent option for those on a budget.
Is wood glue needed for RTA cabinet assembly?
Having wood glue readily available during the RTA cabinet assembly process is highly recommended for enhancing structural integrity and longevity. By applying the glue to connection areas before assembly, you ensure a stronger bond between components, reinforcing the overall stability of your cabinets. This simple step not only fortifies the joints but also safeguards against potential wear and tear over time, ensuring your cabinets withstand the test of time with resilience.
How much are labor costs for assembling cabinets?
The exact price of labor will vary depending on the contractor. However, on average, labor will cost $300 per linear foot. Hourly costs will differ, but many charge between $40-80.
